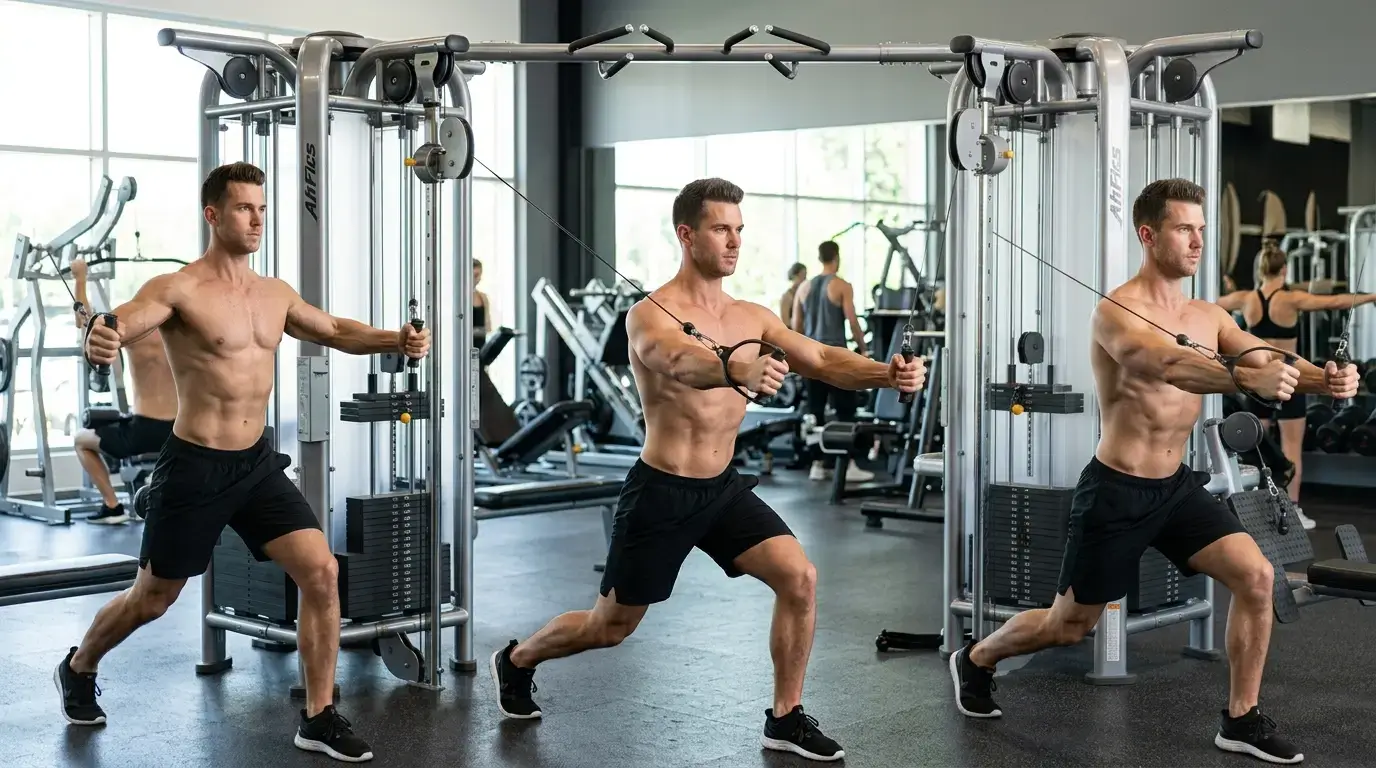
The cable chest press is a standing or seated pressing move that trains your chest, shoulders, and triceps with smooth, steady resistance. If you want to know the cable chest press: how to do it with good form, this guide covers every step. You’ll learn the setup, muscles worked, sets and reps, common mistakes, and easier and harder versions. Whether you train at a commercial gym or on a home functional trainer, you can start today.
Unlike a barbell, cables keep tension on your muscles through the whole rep. As a result, many lifters find the movement easier on their shoulders and easier to feel in the chest. You also get a free core workout, because you have to stay balanced while you press.
QUICK ANSWER
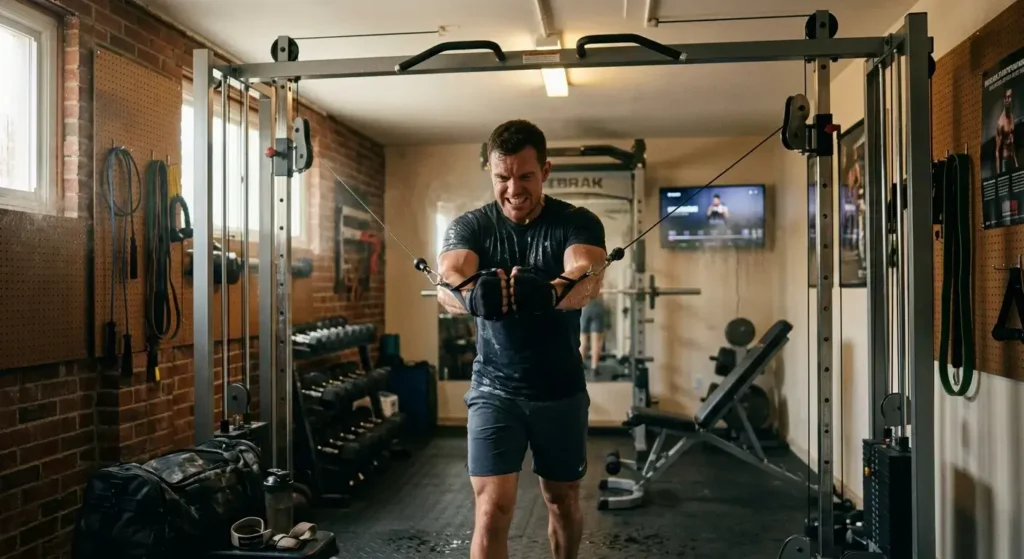
To do a cable chest press, set both pulleys at mid-chest height, grab the handles, and step forward into a split stance. Keep your ribs down and shoulder blades back. Press the handles forward until your arms are nearly straight, pause briefly, then return slowly. Aim for 8-15 reps with control.
Cable Chest Press Muscles Worked
Knowing what the cable chest press works helps you aim the effort where it counts. Therefore, let’s break it into primary and secondary muscles.
Primary muscles
- Pectoralis major: This is your main chest muscle. It pushes your arms forward and across your body.
- Anterior deltoid: The front of your shoulder helps drive every pressing motion.
- Triceps brachii: The back of your upper arm straightens your elbow at the end of each rep.
Secondary and stabilizing muscles
- Serratus anterior: This muscle wraps around your ribs and helps your shoulder blades move smoothly.
- Pectoralis minor: It sits under the big chest muscle and helps stabilize the shoulder blade.
- Core muscles (abs, obliques, and spinal stabilizers): They keep you from leaning or twisting. Standing cable work also challenges your lower body, since your legs and hips hold you steady.
Cable angle changes which part of the chest works hardest. A high-to-low press tends to emphasize the lower chest fibers. Conversely, a low-to-high press shifts more work to the upper chest (the clavicular head). For a general, balanced chest press, keep the pulleys at mid-chest.
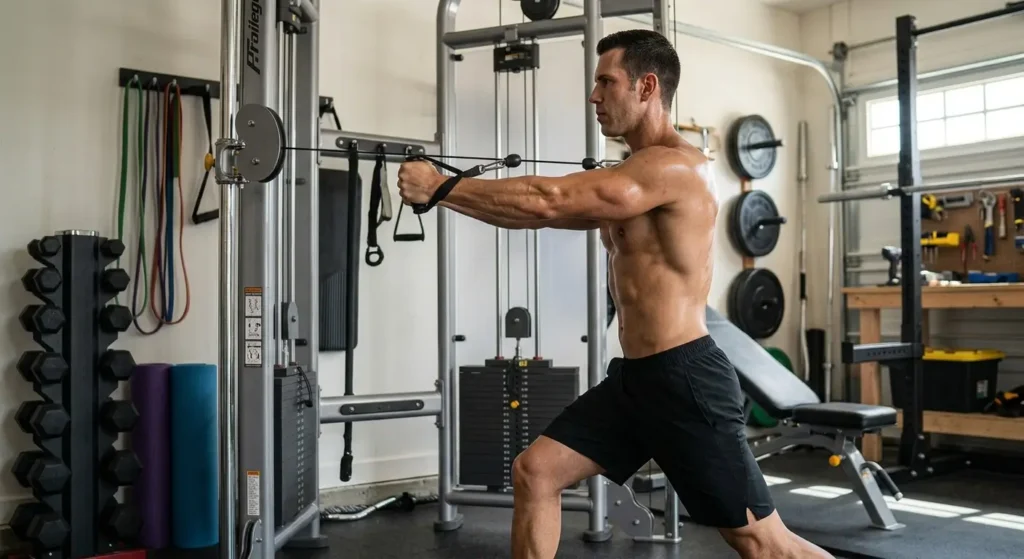
Benefits of the Cable Chest Press
First, cables provide steady resistance. A dumbbell feels easiest at the bottom and hardest in the middle. A cable, on the other hand, pulls on you the entire time, so your muscles stay busy from start to finish.
Second, the path of the handles is flexible. Because each arm moves independently, your shoulders can follow a natural arc instead of being locked into a bar path. Many lifters with cranky shoulders find this more comfortable, although it isn’t a cure for pain.
Third, it builds balance and core control. When you stand, your trunk has to resist the pull of the cables. In addition, each arm works separately, which can help you spot and reduce strength differences between your left and right side.
Fourth, it’s easy to adjust. Changing the weight takes seconds with a pin, so you can make small, steady jumps. Small jumps matter because gradual progression is a core principle in the ACSM progression models for resistance training.
Finally, it fits many spaces. A single adjustable cable station or functional trainer covers dozens of exercises. If you’re shopping for a setup, our best Bowflex home gym overview shows what these machines can do.
How to Do a Cable Chest Press: Step-by-Step Form
Follow these steps for a standing cable chest press with a staggered stance. This is the most popular version and a great place to start.
What you need: A cable crossover machine or functional trainer with two adjustable pulleys, plus two D-handles.
- Set the pulleys. Move both pulleys to about mid-chest height. For most people that is roughly 45-55 inches (114-140 cm) from the floor, but use your own chest as the guide. Attach one D-handle to each side.
- Pick a light weight. Beginners can start with about 10-15 lb (4.5-7 kg) per side. Stack ratings vary by machine, so treat the number as a starting point and adjust.
- Grab the handles. Hold each handle with your palm facing down or slightly inward. Your elbows should be bent and sit just below shoulder height.
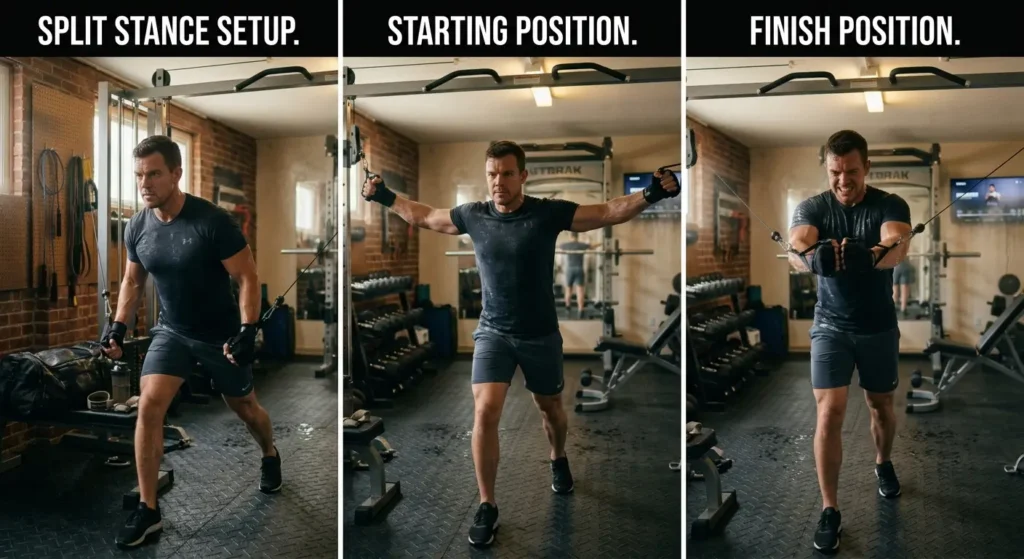
- Step forward into a split stance. Walk out one to two steps until the weight lifts off the stack. Place one foot ahead of the other, about 12-18 inches (30-46 cm) apart. Bend both knees slightly.
- Set your torso. Lean forward a few degrees from the hips, keep your chest tall, and brace your abs as if preparing to be tapped in the stomach. Pull your shoulder blades gently back and down.
- Press forward. Push both handles out and slightly toward each other. Straighten your arms until they are almost locked out, and bring the handles near the center of your body.
- Squeeze and pause. Hold for one second and focus on squeezing your chest.
- Return slowly. Let your hands travel back over about three seconds. Stop when your elbows are roughly in line with your torso. Then repeat.
COACH’S TIP
Think “hug a big tree” rather than “punch straight ahead.” When the handles move forward and slightly together, the chest works harder. Also keep your wrists stacked over your forearms so the handles don’t bend them backward.
What the movement should feel like
At the start, you should feel a comfortable stretch across the front of your chest. During the press, expect your chest and triceps to burn first, with your front shoulders helping. If your neck or the front of your shoulder feels pinchy or sharp, stop, lighten the load, and adjust your form.
Tempo and breathing
Use a controlled tempo of about 2 seconds pressing, 1 second pause, 3 seconds returning. Exhale as you press and inhale on the way back. Furthermore, avoid holding your breath through the hardest part of the rep.
Sets, Reps, and Weight by Goal
Your goal decides how heavy to go and how long to rest. Use the table as a starting point, then adjust based on how the last few reps feel.
| Goal | Sets | Reps | Weight (effort) | Rest | Tempo |
|---|---|---|---|---|---|
| Strength | 3-5 | 4-6 | Heavy; 1-2 reps left in reserve | 2-3 min | 2-1-2 |
| Muscle growth | 3-4 | 8-12 | Moderate; 1-3 reps left in reserve | 60-90 sec | 2-1-3 |
| Muscular endurance | 2-3 | 15-20 | Light to moderate | 30-60 sec | 1-1-2 |
| Beginner starter | 2 | 10-12 | Light; stop with 3-4 reps left | 60-90 sec | 2-1-3 |
A few details explain these numbers. Research on rest intervals suggests that resting at least two minutes between sets may support greater strength gains than resting one minute. Meanwhile, a review of load and training adaptations found heavier loads tend to be better for max strength, while muscle growth can happen across a wide range of loads when sets are taken close to failure.
Weekly volume matters too. A meta-analysis on training volume linked more weekly sets with more muscle growth, within reason. For most beginners, 6-10 hard sets of chest work per week is a sensible starting range. Training the chest about twice a week is also linked to better muscle growth than training it once, according to a review of training frequency.
Remember that “effort” beats the number on the stack. Cable machines use pulleys, so a stack labeled 20 lb (9 kg) may feel different from a 20 lb dumbbell. Rely on how hard the set feels, not just the label.
Common Mistakes and How to Fix Them
COMMON MISTAKE
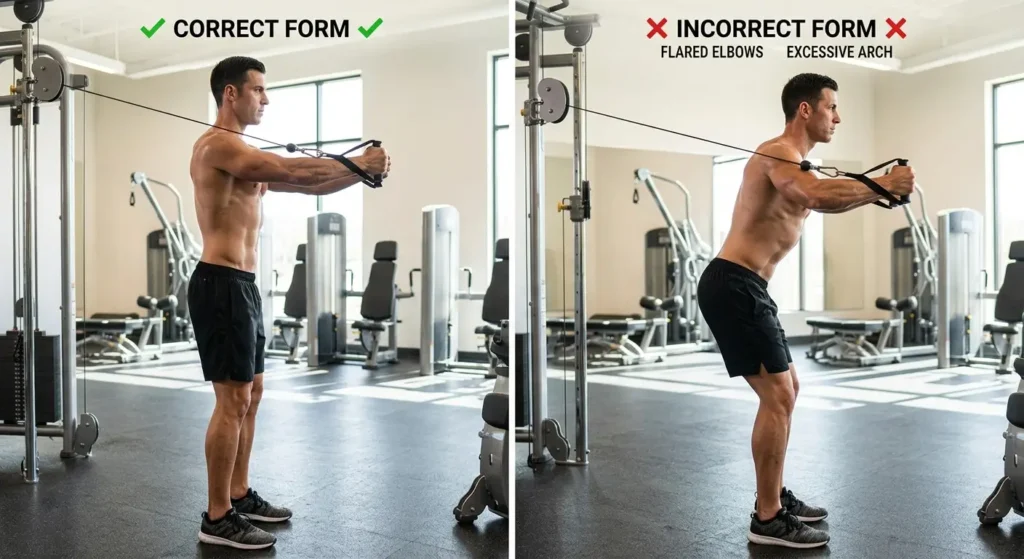
Letting the shoulders roll forward and the elbows flare out wide. This puts stress on the front of the shoulder and takes tension off the chest. Fix it by tucking your elbows at about a 45-degree angle from your torso and keeping your shoulder blades pulled back.
Beyond that, watch for these frequent errors:
- Using too much weight. If your torso twists or you lunge forward to finish reps, the load is too heavy. Drop 10-20% and make every rep clean.
- Leaning back and arching. An excessive arch means your lower back is doing the work. Brace your abs, tuck your ribs down, and stay tall.
- Rushing the return. Letting the handles snap back wastes half the exercise. Control the return for three seconds.
- Setting pulleys at the wrong height. If they sit too high or low, the press becomes a front raise or a dip. Match the pulleys to your chest unless you’re deliberately targeting upper or lower fibers.
- Shrugging the shoulders. When your shoulders creep toward your ears, your upper traps take over. Think “long neck, shoulders down.”
- Locking out hard. Slamming your elbows straight can strain the joint. Finish with a soft bend or just short of lockout.
- Standing too close to the stack. With no tension at the start, you lose the stretch and the control. Take one more step forward.
If posture is a recurring problem, such as rounded shoulders from desk work, strengthening your upper back can help. Our guide to the seated bent-over rear delt raise shows one useful way to balance all that pressing.
Variations: Easier to Harder
Easier versions (regressions)
- Seated cable chest press: Sit on a bench with your back supported. Because you don’t need to balance, you can focus on pressing. Begin with 8-12 lb (3.6-5.4 kg) per side.
- Single-arm, staggered stance with a light load: Press one handle at a time while the free hand rests on your hip. This teaches body control at low weight.
- Resistance band chest press: Anchor a band behind you at chest height. The lower load makes it a gentle way to learn the motion.
- Shorter range of motion: Use a smaller range and a lighter weight for the first two weeks. Add range once the movement feels natural.
Standard version
The standing, two-arm, split-stance press described above is your baseline. Master it with 2-3 sets of 12 reps before moving on.
Harder versions (progressions)
- Add weight gradually. When you reach the top of your rep range on all sets, increase the load by the smallest increment your stack allows.
- Slow the tempo. Try a 4-second return or a 2-second pause at the squeeze. This increases time under tension without needing more weight.
- Single-arm standing press. Pressing one arm at a time forces your core to resist rotation. It is a tougher test of balance and trunk strength.
- Low-to-high press. Set pulleys near the floor and press up and forward. It shifts emphasis toward the upper chest.
- Staggered-to-narrow stance. Bringing your feet closer together makes balance harder. Use it only after you’ve mastered the split stance.
- Add a pause rep or a drop set. On your last set, lower the weight by about 20-30% and keep going to near-failure.
Cable Chest Press Alternatives
You won’t always have a cable station. Fortunately, there are good alternatives for every setup.
| Equipment | Alternative | Why it works |
|---|---|---|
| No equipment | Push-up (or incline push-up) | Trains the same pressing pattern with your body weight. See our calisthenics exercises list for more ideas. |
| No equipment | Resistance band press | Provides a similar tension curve at low cost and is easy to travel with. |
| Dumbbells | Dumbbell bench press or floor press | Allows independent arms. Choosing between styles? Our hex vs. round dumbbells comparison can help you buy the right set. |
| Cable | Cable fly (crossover) | Isolates the chest with less triceps involvement. |
| Machine | Seated machine chest press | Fixed path makes it very beginner-friendly. Read about the Hammer Strength chest press for a popular plate-loaded option. |
| Barbell | Barbell bench press | Best for heavy loading, though it needs a spotter or safety arms. |
If space is tight, one adjustable cable unit plus a bench can replace several machines. Our list of the best apartment workout equipment includes options for small rooms.
Cable Press vs. Bench Press: Which Is Better?
Neither is universally better; they do different jobs. The bench press lets you move the most weight, which suits max strength. The cable chest press gives constant tension, a more adjustable path, and a bigger balance challenge, so it is useful for muscle building and joint-friendly volume. Many lifters use both: barbell or dumbbell presses first for heavy work, then cables for extra volume.
Who Should Be Careful
The cable chest press is suitable for most healthy adults. Even so, some people should take extra care.
- Recent or current shoulder, elbow, or chest injuries: Check with a doctor or physical therapist before adding pressing movements.
- Recent surgery on the chest, shoulder, or heart: Get medical clearance first.
- Chest pain, dizziness, or shortness of breath during exercise: Stop immediately and seek medical advice.
- High blood pressure or other medical conditions: Ask your doctor about safe exercise and breathing technique, since straining and breath-holding can raise blood pressure temporarily.
- Pregnancy or postpartum: Ask your healthcare provider which exercises and positions are appropriate for you.
- Older adults and complete beginners: Start light, use the seated version, and progress slowly.
Mild muscle soreness is normal. In contrast, sharp, pinching, or joint pain is a signal to stop. Always warm up first with 5 minutes of light cardio and a few sets of arm circles and band pull-aparts.
Sample Workout Using the Cable Chest Press
Here is a simple 45-minute chest-and-triceps day that you can do once or twice per week. It is based on the CDC and HHS recommendation of muscle-strengthening activity on at least two days per week.
Warm-up (5-8 minutes): Easy cycling or rowing, arm circles, 2 sets of 15 band pull-aparts, and 1 set of 10 light cable presses.
| Order | Exercise | Sets | Reps | Rest |
|---|---|---|---|---|
| 1 | Standing cable chest press | 3-4 | 8-12 | 60-90 sec |
| 2 | Incline dumbbell press | 3 | 8-12 | 90 sec |
| 3 | Cable fly (mid-height) | 2-3 | 12-15 | 60 sec |
| 4 | Cable triceps pressdown | 3 | 10-15 | 60 sec |
| 5 | Push-ups (to near-failure) | 2 | AMRAP* | 60 sec |
*AMRAP means “as many reps as possible” with good form.
Cool-down (3-5 minutes): Gentle doorway chest stretch for 20-30 seconds per side, followed by easy breathing.
Progression plan: Stay at the same weight until you hit 12 reps on every set with 1-2 reps left in reserve. Then raise the load by one small stack increment. If you are short on time, you can pair this session with a leg and shoulder workout on another day to balance your week. Likewise, add pulling work, such as the movements covered in our guide to what muscles pull-ups work, so your back keeps pace with your chest.
Frequently Asked Questions
How do you do a cable chest press correctly?
Set the pulleys at mid-chest height, step forward into a split stance, and brace your core. Press the handles forward and slightly together until your arms are almost straight. Pause for a second, then return over three seconds. Keep your shoulder blades back and elbows at roughly 45 degrees.
What muscles does the cable chest press work?
It mainly works the pectoralis major (chest), the front deltoids (shoulders), and the triceps. Stabilizers such as the serratus anterior and core muscles also contribute. Adjusting pulley height shifts the emphasis between the upper and lower chest.
How heavy should I go on a cable chest press?
Choose a weight that lets you finish your target reps with good form and about 1-3 reps left in reserve. Beginners often begin near 10-15 lb (4.5-7 kg) per side. Because stacks differ between machines, adjust based on effort rather than the label.
How many sets and reps should I do?
For muscle growth, try 3-4 sets of 8-12 reps with 60-90 seconds of rest. For strength, use 3-5 sets of 4-6 reps with longer rests of 2-3 minutes. Beginners can start with 2 sets of 10-12 reps.
Can you build a big chest with cables only?
Yes, it is possible. Muscle growth depends on sufficient effort, volume, progression, and recovery rather than a specific machine. Cables can provide all of these when you add weight or reps over time. Combining cables with dumbbell or bodyweight presses adds useful variety.
Why do I feel cable chest presses in my shoulders?
Shoulder dominance usually comes from flared elbows, rounded shoulders, or too much weight. Tuck your elbows to about 45 degrees, pull your shoulder blades back, and lower the load. If you feel sharp pain, stop and consult a doctor or physical therapist.
Conclusion
The cable chest press is a simple, adaptable way to build chest, shoulder, and triceps strength with steady tension. Now that you know the cable chest press: how to do it step by step, focus on the basics. Set the pulleys at mid-chest, brace your core, press with control, and lower slowly. Start light, add weight gradually, and use the easier or harder variations to match your level.
Train your chest about twice per week, pair it with plenty of pulling work, and track your sets and reps so you can see progress. Small, consistent improvements will do more for you than ego lifting ever will. If you have pain, an injury, or a health condition, check with a doctor or physical therapist first.
