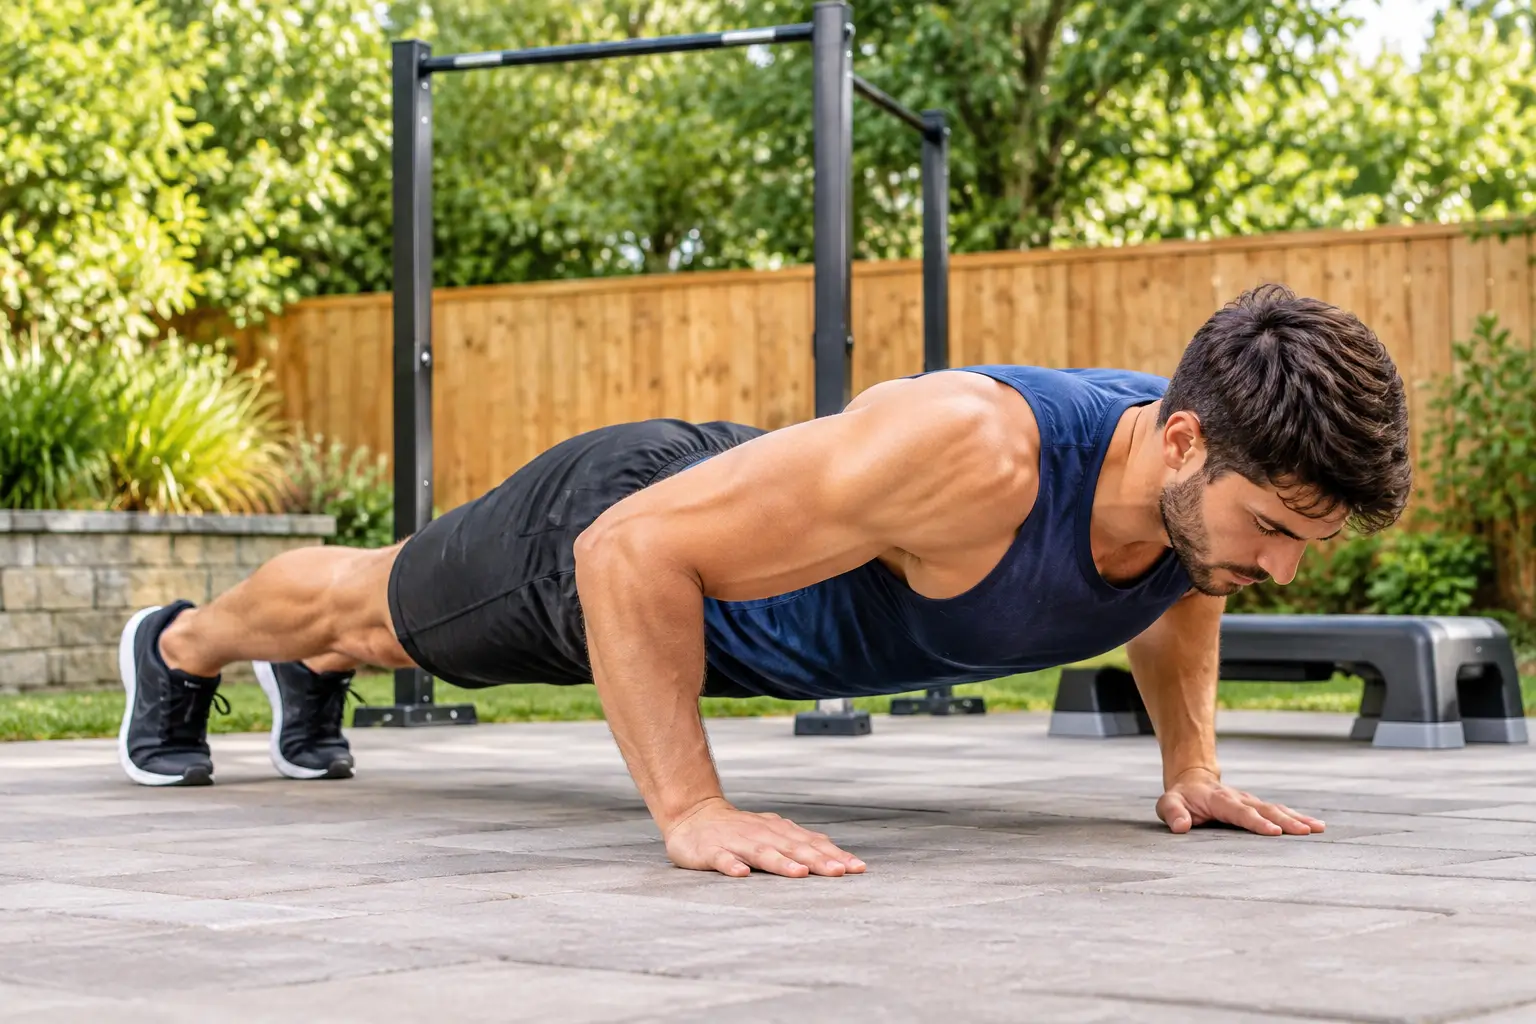
A well-built 12-week calisthenics program can take you from your first controlled push-up to harder skills like pull-ups and archer push-ups, with no gym membership. Every week has a purpose, and each phase builds on the one before it. Because the plan is written out, you never have to guess what comes next.
Calisthenics simply means training with your own bodyweight as resistance. However, your bodyweight is fixed, so progress comes from changing leverage, range of motion, and tempo instead of adding plates. For that reason, a structured 12-week calisthenics program beats random workout videos.
Below, you’ll find three four-week phases, workout tables, and form cues for every move. In addition, each exercise has an easier and a harder option, so you can match the plan to your level. First, here is the short version.
Quick Answer: A 12-week calisthenics program works best as three full-body sessions per week, split into three four-week phases: foundation, build, and challenge. Each workout takes about 40 minutes and needs only a floor, a sturdy table or bar, and a step. Progress by adding reps first, then switching to a harder exercise variation.
Who This 12-Week Calisthenics Program Is For
This plan fits healthy adults who are new to calisthenics or returning after a long break. It also suits early intermediates who can do a few push-ups but not yet a clean pull-up. Once you finish, our calisthenics exercises list offers a wider menu of moves to explore.
Specifically, the program works well if you want a simple routine, train at home, or enjoy measurable progress. On the other hand, competitive gymnasts and anyone who needs rehabilitation exercises should look elsewhere.
Before you start, check with a doctor or physical therapist if you have joint pain, a past injury, heart or blood pressure concerns, or any medical condition. The same advice applies if you are pregnant or postpartum. Also, stop any exercise that causes sharp pain.
Furthermore, the plan lines up with public health guidance. The CDC says adults need at least two days of muscle-strengthening activity each week, and this program gives you three.
Equipment for the 12-Week Calisthenics Program
You can start the 12-week calisthenics program with almost nothing. Here is what each phase needs:
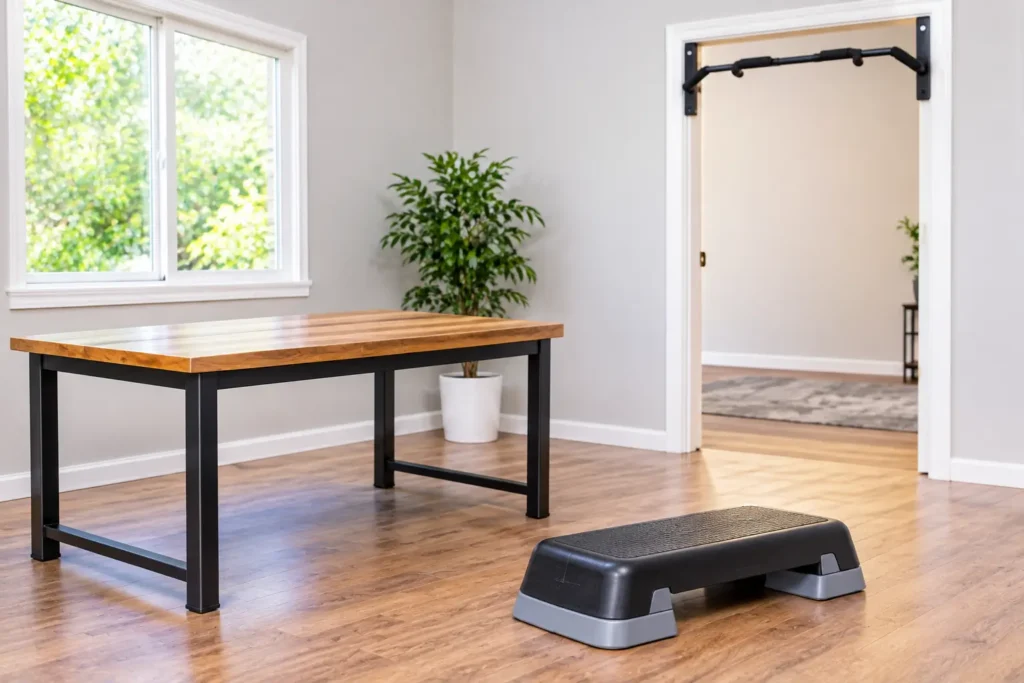
- Floor space: about 6 × 3 feet (183 × 91 cm) for push-ups and core work.
- Sturdy table or low bar: about 28–30 inches (71–76 cm) high for inverted rows. Test it first by pulling down hard before you trust it.
- Step, bench, or sturdy chair: 16–24 inches (41–61 cm) high for incline push-ups and split squats.
- Pull-up bar (from Week 5): a doorway bar, wall-mounted bar, or park bar works. Check each product’s weight rating on the manufacturer page [VERIFY].
- Optional extras: a resistance band for assisted pull-ups, plus a backpack you can load with 5–10 lb (2.3–4.5 kg) in Phase 3.
If you are shopping for a bar, our guide to the best squat racks with pull-up bars covers sturdier options. Meanwhile, short on space? The list of best apartment workout equipment shows compact gear that still works with this plan.
Warm-Up (6–8 Minutes)
A warm-up before each session of the 12-week calisthenics program raises your body temperature and prepares your joints for work. Mayo Clinic suggests warming up with a few minutes of brisk walking or another aerobic activity, which may lower injury risk. After that, move through this sequence:
- March or jog in place for 2 minutes.
- Do arm circles: 10 forward and 10 backward.
- Perform 8 slow reps of cat-cow.
- Try 8 scapular push-ups, keeping your arms straight so only your shoulder blades move.
- Add 10 bodyweight squats.
- Follow with 10 hip hinges.
- Finish with 10 glute bridges.
From Week 5 onward, add a 15–20 second dead hang from your bar. As a result, your grip and shoulders will be ready for pulling.
12-Week Calisthenics Program: The Workouts
Every phase lasts four weeks, and you train three days per week, such as Monday, Wednesday, and Friday. Because each session is full body, you hit every major muscle group three times weekly. For comparison, Mayo Clinic notes that two or three 20- to 30-minute sessions per week can bring significant strength gains. Our sessions run longer mainly because of the warm-up and rest periods.
Research also supports this approach. The 2026 ACSM position stand concludes that healthy adults should perform progressive resistance training to improve muscle function, size, and physical performance. In calisthenics, “progressive” simply means moving to harder exercise variations over time.
Phase 1: Foundation (Weeks 1–4)
The goal here is clean form and a steady habit. Therefore, stop each set with 2–3 reps left in the tank.
| Exercise | Sets | Reps | Rest |
|---|---|---|---|
| Incline push-up | 3 | 8–12 | 60–90 sec |
| Inverted row (knees bent) | 3 | 6–10 | 60–90 sec |
| Bodyweight squat | 3 | 10–15 | 60 sec |
| Glute bridge | 3 | 12–15 | 45–60 sec |
| Dead bug | 3 | 8 per side | 45 sec |
| Forearm plank | 3 | 20–30 sec | 45 sec |
Phase 2: Build (Weeks 5–8)
Now the goal shifts to more load per rep. To that end, you move to the floor for push-ups and start vertical pulling.
| Exercise | Sets | Reps | Rest |
|---|---|---|---|
| Floor push-up | 3–4 | 6–12 | 60–90 sec |
| Band-assisted or negative pull-up | 3 | 3–6 | 90–120 sec |
| Split squat | 3 | 8–10 per leg | 60–90 sec |
| Single-leg glute bridge | 3 | 8–10 per leg | 45–60 sec |
| Pike push-up | 3 | 5–8 | 90 sec |
| Hollow-body hold | 3 | 15–25 sec | 45–60 sec |
Phase 3: Challenge (Weeks 9–12)
In this final phase, you work on skill and strength under harder leverage. Choose the version that lets you hit the rep range with good form.
| Exercise | Sets | Reps | Rest |
|---|---|---|---|
| Archer or decline push-up | 4 | 5–10 | 90 sec |
| Pull-up (or slow negatives) | 4 | 3–8 | 90–120 sec |
| Bulgarian split squat | 4 | 6–10 per leg | 90 sec |
| Elevated pike push-up | 3 | 6–10 | 90 sec |
| Hanging knee raise | 3 | 8–12 | 60 sec |
| Side plank | 3 | 20–40 sec per side | 45 sec |
Why the Rest Times Look This Way
Rest periods matter more than most beginners expect. The ACSM’s 2009 position stand describes 1- to 2-minute rests between sets for muscle-building training, and that range guides the tables above. Hard pulling sets get a little extra time, since they demand more from your grip and back.
How to Do Each Exercise
Use a 2-second lowering phase and a controlled lift on every rep. In short, quality beats speed.
Push-Up Family (Incline, Floor, Archer, Decline)
- Place your hands slightly wider than your shoulders, about 20–24 inches (51–61 cm) apart.
- Make a straight line from head to heels by squeezing your glutes and bracing your abs.
- Lower your chest to within 1–2 inches (3–5 cm) of the surface, keeping your elbows at roughly 45 degrees.
- Press the floor away until your arms are straight.
You should feel the work in your chest, front shoulders, and triceps. Wondering how much your arms contribute? Our breakdown of push-ups for biceps explains it.
Coach’s Tip: Imagine you are trying to “screw” your hands into the floor, rotating outward without moving them. This cue engages your lats and protects your shoulders. If your hips sag, raise your hands on a higher surface.
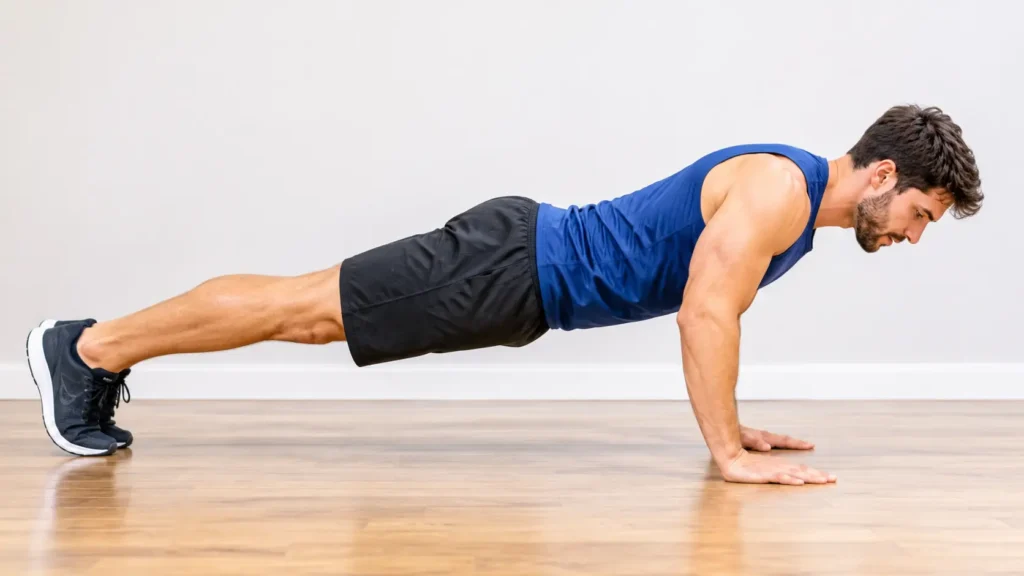
For an easier version, try wall or high-incline push-ups. To make it harder, move to archer push-ups, decline push-ups, or a 4-second lowering phase.
Common Mistake: Flaring your elbows straight out at 90 degrees. This position stresses the shoulders and shortens your range. Instead, tuck your elbows to about 45 degrees.
Inverted Row
- Lie under your table or bar and grip it slightly wider than shoulder width.
- Straighten your body from head to heels, bending your knees during Phase 1.
- Pull your chest toward the bar while squeezing your shoulder blades together.
- Lower for 2–3 seconds under control.
This move works your upper back, rear shoulders, and biceps. If it feels too hard, stand more upright to reduce the load. Conversely, you can straighten your legs and then raise your feet on a step to increase the challenge.
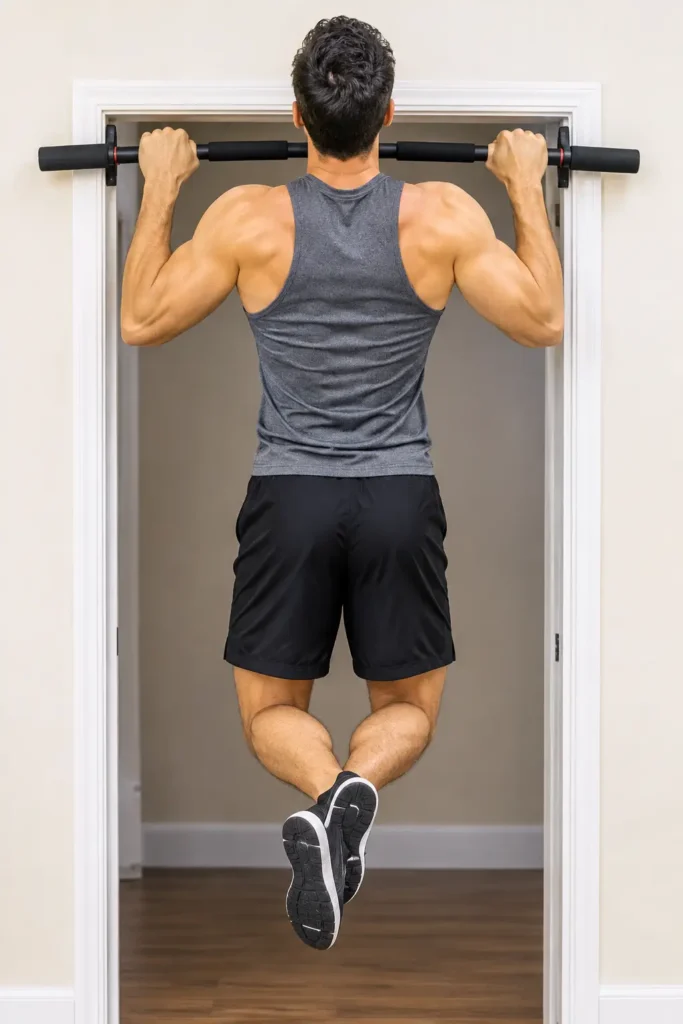
Pull-Up, Band-Assisted Pull-Up, and Negatives
- Grip the bar just outside shoulder width with your palms facing away.
- Start from a dead hang or, for negatives, jump or step to the top.
- Pull your elbows down toward your ribs until your chin clears the bar.
- Lower for 3–5 seconds until your arms are straight.
Pull-ups train mainly your lats, biceps, and upper back. For a closer look, see our guide to which muscles pull-ups work.
To make pull-ups easier, do negatives only with a 5-second lowering phase, or loop a band under your foot. For a harder option, pause for 2 seconds at the top, or wear a backpack with 5–10 lb (2.3–4.5 kg).
Squat, Split Squat, and Bulgarian Split Squat
- Stand with your feet shoulder-width apart and toes turned out slightly.
- Sit your hips back and down until your thighs are about parallel to the floor.
- Keep your whole foot planted and your knees tracking over your toes.
- Drive up through your midfoot.
For split squats, take a long stride and lower your back knee toward the floor. Bulgarian split squats are similar, except your back foot rests on a 16–24 inch (41–61 cm) step. Your quads and glutes should burn, and you should feel steady rather than wobbly.
If you need an easier version, squat to a chair. Alternatively, add a 5–10 lb (2.3–4.5 kg) backpack or slow your lowering to 4 seconds for extra challenge. Isometric holds also build leg control, so try these isometric leg exercises on off days if you like.
Glute Bridge and Single-Leg Bridge
- Lie on your back with your knees bent and feet about 12 inches (30 cm) from your hips.
- Press through your heels and lift your hips until your shoulders, hips, and knees form a straight line.
- Pause for 1 second, then lower slowly.
You can shorten the range for an easier version. On the other hand, a single-leg version or a foot-elevated version on a step makes the move much harder.
Dead Bug, Plank, Hollow Hold, and Hanging Knee Raise
In calisthenics, your core’s main job is to keep your torso rigid. For the dead bug, lie on your back with your arms up and knees at 90 degrees, then lower the opposite arm and leg while your lower back stays flat. During planks, squeeze your glutes and avoid arching. For the hollow hold, press your lower back down and lift your shoulders and legs slightly.
To make these easier, keep your knees bent and shorten the lever. Later, extend your legs and add time. Meanwhile, if you wonder whether hanging moves hit your midsection, our article on whether pull-ups work your abs clarifies what to expect.
Pike Push-Up and Elevated Pike Push-Up
- Start in a downward-dog shape with your hips high and feet about shoulder-width apart.
- Bend your elbows and lower the top of your head toward the floor in front of your hands.
- Press back up until your arms are straight.
You will feel this move mostly in your shoulders and triceps. For an easier version, put your hands on a step. For a harder one, place your feet on a 16–24 inch (41–61 cm) step.
Weekly Schedule and Progression Plan
Your Weekly Layout
A basic week looks like this:
| Day | Activity |
|---|---|
| Monday | Full-body workout |
| Tuesday | Rest or easy walk |
| Wednesday | Full-body workout |
| Thursday | Rest or easy walk |
| Friday | Full-body workout |
| Saturday | Optional walk of 1–2 miles (1.6–3.2 km) |
| Sunday | Full rest |
Spacing matters because muscles recover between sessions. In fact, Mayo Clinic advises one full rest day between exercising each specific muscle group. Daily squatting is a common question, so our article on doing squats every day explains the trade-offs.
Besides that, the easy walks help you reach the CDC’s aerobic target of 150 minutes of moderate activity per week, which the agency lists alongside the muscle-strengthening advice.
Week-by-Week Roadmap
| Week | Focus | What to do |
|---|---|---|
| 1 | Baseline | Test your max reps (see below), then train at the low end of each rep range |
| 2–3 | Add reps | Move toward the top of each range |
| 4 | Consolidate | Do 2 sets per exercise and focus on form |
| 5 | Transition | Start Phase 2 exercises at the low end |
| 6–7 | Add reps | Build toward the top of each range |
| 8 | Consolidate | Do 2 sets and practice negatives |
| 9 | Transition | Start Phase 3 variations at the low end |
| 10–11 | Add reps and sets | Reach the 4-set targets |
| 12 | Retest | Repeat your Week 1 tests |
The Progression Rule
Use double progression. First, add reps until you hit the top of the range on every set. Then, once you do that for two sessions in a row with clean form, move to the next harder variation and drop back to the low end of the range.
For example, if you complete 3 sets of 12 incline push-ups in two sessions, lower the incline and begin again at 8 reps. As a result, your difficulty rises steadily without big jumps.
Baseline Tests (Weeks 1 and 12)
Test on a rested day and write the numbers down. Specifically, record these four results:
- Max push-ups with good form (incline or floor)
- Max inverted rows
- Squats completed in 60 seconds
- Forearm plank hold time
Together, these numbers show your improvement far better than the mirror does.
Beginner and Advanced Versions
Beginner Version
If the program feels too hard, train two days per week and do 2 sets per exercise. Next, swap in wall push-ups, a high-incline step, and bent-knee rows. Then repeat Phase 1 for six weeks before moving on. Slower progress is perfectly fine.
Advanced Version
If the plan feels too easy, add a 10–20 lb (4.5–9 kg) weighted vest or backpack to squats and pull-ups. Likewise, slow your lowering phase to 4 seconds. After that, try archer push-ups, one-arm incline push-ups, and single-leg squat progressions such as sissy squats if your knees feel good. Add a fourth day only when you are recovering well.
Even so, treat extra volume as optional. The ACSM overview points out that the best prescription varies by person, so adjust to how you recover.
Cool-Down (5 Minutes)
First, slow your heart rate with 2 minutes of easy walking. Next, stretch gently, holding each position for 20–30 seconds without pain. Good choices include a doorway chest stretch, a lat stretch with your hands on a table, a kneeling hip flexor stretch, a standing quad stretch, and a seated hamstring stretch.
Meanwhile, breathe slowly and keep your shoulders relaxed. Although cooling down will not prevent soreness, it helps you wind down after training.
Tips for Results From Your 12-Week Calisthenics Program
Habits That Drive Progress
First, log every workout. Write down sets, reps, and the variation you used, because a simple notebook is enough. Second, use a 2-1-1 tempo: lower for 2 seconds, pause for 1, and lift in about 1. As a result, your reps stay honest.
In addition, leave 1–3 reps in reserve during Phases 1 and 2. Then, in Phase 3, go closer to failure only on your last set.
Recovery and Pacing
Dull muscle soreness is normal. However, sharp or joint pain means you should stop and modify the exercise. Likewise, don’t skip the lighter weeks, since Weeks 4 and 8 let your joints and tendons catch up with your muscles.
Above all, keep going. An imperfect plan you follow for 12 weeks beats a perfect plan you abandon in three. Meanwhile, easy walks fill in your aerobic activity without taxing recovery.
Know the Limits of Bodyweight Training
Bodyweight work builds strength, but it has limits. Once you can do many reps of the hardest variation, adding load keeps progress going. For example, one graduate study found that progressive push-up variations can improve upper-body strength in trained men, which is the same principle you use here. Still, results vary, so measure your progress against your Week 1 numbers.
FAQ
How many days a week should I do calisthenics?
Three non-consecutive days suit most beginners on a 12-week calisthenics program. Two days also work if time or recovery is limited. Public health guidance recommends at least two days of muscle-strengthening activity weekly, so both options meet the minimum. Add a fourth day only after Week 8.
Can beginners do calisthenics?
Yes. Beginners start with easier versions such as wall or incline push-ups, bent-knee inverted rows, and squats to a chair. These lower the load while teaching good form. Afterward, move to harder variations only once you hit the top of your rep ranges with controlled technique.
Can you build muscle with calisthenics in 12 weeks?
Many people gain strength and some muscle in 12 weeks, especially beginners. However, results depend on effort, food intake, sleep, and progression. Research suggests progressive resistance training improves muscle size and function in healthy adults, and progressive bodyweight variations can provide that challenge. Individual results vary.
What equipment do I need for calisthenics?
At first, you need only a floor, a sturdy table or low bar, and a step or chair. From Week 5, a pull-up bar helps with vertical pulling. Optional extras include a resistance band, a weighted backpack, parallettes, and gymnastic rings, but none are required to finish Phase 1.
How long does it take to do a pull-up?
It depends on your starting strength and bodyweight. Many beginners need several weeks of inverted rows and negative pull-ups before a full rep. Because this program builds that base in Phases 1 and 2, a first pull-up in Phase 3 is realistic for some people, though not guaranteed.
Should I do calisthenics every day?
Daily training is not necessary for this plan and may limit recovery. Muscles adapt during rest, so Mayo Clinic suggests a full rest day between working the same muscle group. Instead, stick with three strength days and use light walking or stretching on the other days.
Final Thoughts on Your 12-Week Calisthenics Program
A 12-week calisthenics program works because it is simple, progressive, and measurable. You train three days a week, add reps, move to harder variations, and retest in Week 12. Each phase then builds on the last.
To begin, take your baseline tests and stay patient through the foundation phase. Afterward, let the progression rule guide you. When Week 12 ends, compare your numbers with Week 1. Finally, choose a new goal, such as a strict pull-up set or a weighted version of the plan. Consistency will do most of the work.
